Wednesday, 6 August 2014

July roundup (just a wee bit late)

Usually for us jewellery makers things slow a little in July and August; which to be honest is quite welcome for me as the girls break up for school, and I have less time to play work anyway.

But this year I've had more orders than probably the last four Julys put together. And now that the girls are older, (and spent the first week of the school holidays doing a drama and dancing summer school!) I've managed to keep up and it's all worked out well so far. Whoop.

So what have I been up to?

July saw a delivery of more rose cut stones...


(swoon - I am still a little obsessive about these)

I nabbed some of these blue chalcedony stones for me....(mine, mine, they're all mine)


But you can still grab your own pair if you're quick!

Some of my favourite other July makes were:


This moonstone and sterling silver ring. Moonstone is the alternative birthstone for June and I just love that blue flash as it catches the light. Apparently it's called moonstone because the Romans believed it had moonlight held within it. 

I also made quite a few other birthstone goodies. As you may know by now I do love jewellery with has that extra meaning...such as birthstones. This lovely ruby (July birthstone) set was particularly nice to work on, and I'm hoping to offer this across all the birthstones soon....


I've also been working on some druzy earrings. Remember that druzy ring I made recently? But more on all that in another post soon.

Hope you're all enjoying your summer!

Sunday, 27 July 2014

Bloglovin

Follow my blog with Bloglovin

Have you tried bloglovin yet? It's a nice way to follow and keep up with blogs. You can pop them into different categories, and get a list of updates emailed to you daily.

I've been trying to find a way to keep track of blogs since google reader shut down last year, and this seems okay, but I wonder if there's something better out there? Do you use anything to organise the blogs you follow? I'd love to know!

Thursday, 10 July 2014

The soundtrack to my morning.

Was feeling a bit tired and sluggish this morning, so I listened to music on my dog walk this morning. I don't usually. And in fact I feel like I haven't listened to music for ages; even in the studio I've got audiobooks on most of the time.

The shuffled soundtrack to my stroll went like this..

There ain't half been some clever bastards (Ian Dury)
Mountain sound (Of Monsters and Men)
The best things in life (Half man half biscuit) (this song has my all time favourite lyric, but you have to wait until 2.27 for it!)
Mania (Throwing Muses) my all time fave song when I'm in a bad mood.
Handsome stranger called death (Foe)
(and then it went onto some stuff from Frozen that I downloaded for the girls and my cheesy running music but will skim over those)

Haven't stopped grinning yet, isn't it amazing how music can change your mood right around.

Wednesday, 2 July 2014

Challenges for July

Well, it's half way through the year... all my New Year Resolutions are long forgotten. 'Bout time I made some new ones.

First up I saw this Green Smoothie challenge... and thought - yeah why not. I do like a smoothie. And I find all these healthy, beautiful, beaming Americans quite entertaining so I signed up. I wonder if here are any UK based sites like this. I can't imagine I'd be so willing to sign up without the American-ness.

sgs_smoothieleft

Anyway, day 1 went..... ahem..... a little badly. My food processor wasn't that keen on the frozen spinach I threw in and decided to spit it all out. Really. All over the kitchen. Maybe the lid wasn't on that tight either. Hmmm.

Day two is a lot better though. Today I tried a blueberry concoction that I'm supping as I type which  is very tasty (oh and fresh spinach from the garden this time).


The second of the challenges is to list one new item daily.

Every. Single. Day.

Aaaah.

I've signed up to a little listing club on Folksy in order to make myself feel bad if I don't list. Sadly the other "July Lions" are quite a friendly bunch and I doubt they'll tell me off too much. But now at least I don't want to let them down.

It will be very good to get some new stock made and listed before the summer holidays. Because you know what comes around pretty quickly after the summer holidays. And if you don't know I'm SO not telling you, but you can click here to find out if you really have to. (sorry)

I'd love to hear any half year resolutions, or challenges you're doing!

Sunday, 29 June 2014

The story of a ring (part 2)

Setting the stone.

The first part of making a ring was all about the ring shank, once that's done it's time to get the setting for the stone made and soldered onto the shank, and then set the stone.

In the first part I was showing you some rings I was making for Trudi, but then I forgot to take the photos of the setting part - DOH!

So here's a little london blue topaz ring I made for Cheryl. It's a square stone cabochon cut (called a cushion cut) - which means it's flat at the bottom and this one is facetted on top. This is one of my fave stones, so I've got one for me to keep too!

First of all, the bezel wire, which is fine silver needs to be measured out. It's soft and pliable so I usually just wrap it around the stone and make a mark, and cut it to size. Nothing too complicated or mathematical.


Then I make sure the bezel wire fits together nicely, file the edges to give it a nice straight line and solder it together. 


(Do you know how tricky it is to take a photo of yourself soldering!! Must get an assistant next time!)

Then I check that the bezel wire is still a good fit for the stone, by fitting the stone into it. This also helps make sure the shape is correct before I cut out the base of sheet silver and solder the bezel wire to it.

 (Here's the sheet of silver that I'm using for the base)

(And all soldered into place!)

As you can see the silver base sticks out a bit, so at the point I'll saw, or file it off (depending on how much there is). This extra silver goes into a little tub I have and will be recycled - often into little silver balls to add to designs. 


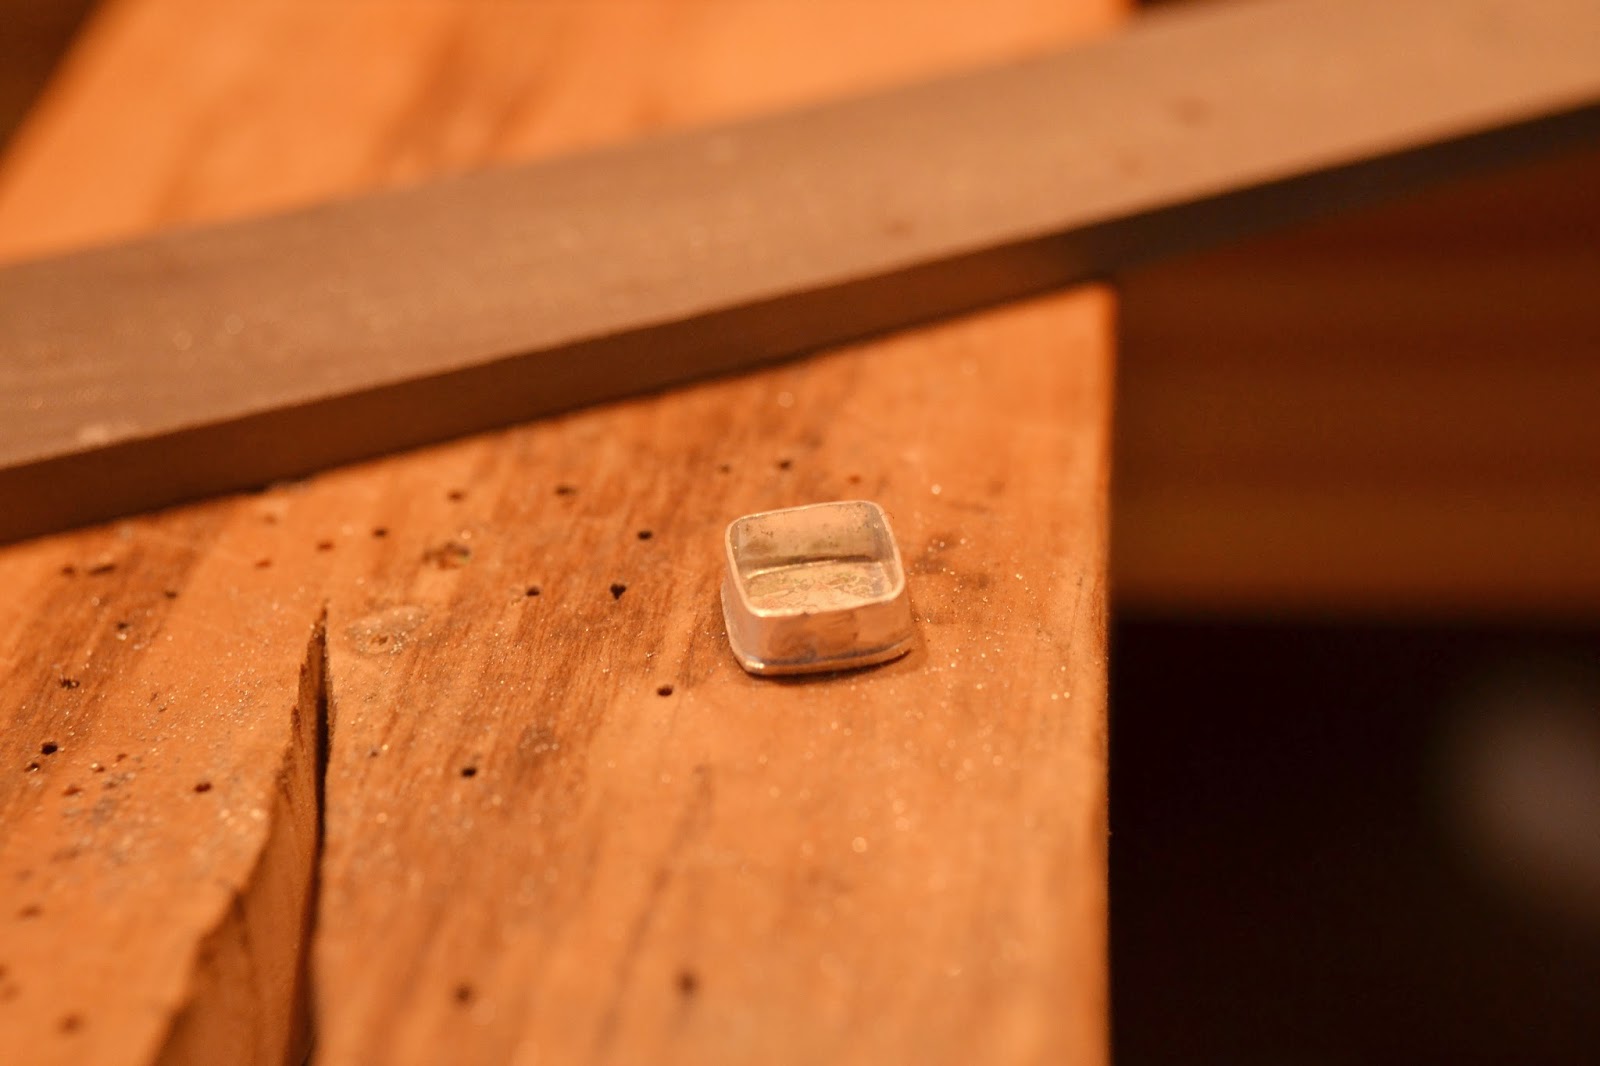
For this setting I then cut the height of the bezel wire down to the right size. It needs to be high enough to keep the stone in securely, but low enough to show off the stone and look good. This can be fiddly! I measure using my digital callipers, and scribe a line in the correct place, then saw it off. Sometimes I'll cut the wire as the first stage - I've no idea which is the right way to do it!


Once it's cut to size, the edges need to be filed nice and smooth. Then it's time to solder onto the ring shank. 

I file the shank a little in the place that the setting will sit to make sure there's a good fit between the two..


Then there's some pickling and cleaning up to be done. It's at this stage that all of the polishing should be done. I often use different grades of sanding paper, or rouge (which is a polishing compound). I've just bought some new polishing compounds that I might switch to in the future. 

Then finally, I get to set the stone. The stone is pushed gently into place - it should be nice and snug. And then I use a bezel rocker to push the bezel wire over the stone to keep it in place. I finish by using smoothing the edges of the wire down. And it's all done. One stone set ring.


A bit of a disclaimer... I'm self taught and I'm definitely not saying that this is the correct way to do it. It's just the way I do it. And I know lots of you are interested in how things are made, so thought this might be of interest. The whole ring from start to finish can take hours and hours to make; as you can see there are lots of fiddly stages and things don't always go to plan! 

Monday, 16 June 2014

The story of a ring....

(or three).

I know lots of you like to see my work in progress; I always loving seeing other people's WIP - how things come together is fascinating. And it's especially nice to see when the work in progress is destined for you; so this one is for you Trudi.

First of all, I measure out the wire I need for each ring, to the millimetre, using my digital calipers.


The wire is shaped into a rough ring shape, and where the two ends of the wire meets I file and sand to make a perfect fit. It takes a little time to ensure that the ring ends meets together snugly and smoothly. These joins are then covered with flux (a liquid which helps the solder to flow), and rings are then soldered in place.

(I didn't mean to make it look like a suprised ring face - honest!)

The rings then go in a pickle pot - a chemical which takes off the heat markings and cleans up the silver. I use an eco-friendly pickle. After ten minutes in this, and a good rinse and clean, the silver is nice and silver again. The rings are then placed on a mandrel and each hammered into a perfect circle.

Then I double check the size - (fingers crossed - phew R1/2 as planned)... and have to saw through the join, remove some of the wire and repeat the process above if it's too big. Luckily thanks to a bit of careful measuring at the start - the size is usually okay.


At this point I usually have a look at the soldered joins, and clear up any messy bits! Thankfully more often than not these days, I tend to use the right amount of solder and don't have too much excess to file away (which takes aaaaages to files, and sand back down to a nice finish). But it hasn't always been the case, and I still do have those days! 


Then we get to the fun bit... adding the settings......(look out for part two coming soon....)

Saturday, 14 June 2014

Today my head has been full of....

This song! Today this song has been going round and round in my head. It's been a Sally Cinnamon kind of Saturday. I've always loved the ending. Those last lines get me every time.

src="http://www.linkwithin.com/pixel.png" alt="Related Posts with Thumbnails" style="border: 0" />